I quite like starting at the basics, and this entails the what’s and why’s of a particular technology as this helps me set the context and understand when to use it.
I’m not going to rewrite the prethora of information that relates to Swagger and Swashbuckle but below, you’ll find useful links that will help answer these questions.
That being said, I’d like to summarise a few things and continue by getting Swagger working on a project…
What is Swagger?
In simple terms, Swagger is a specification that describes the functionality provided by your API. Specifically, it’s intended to address the following:
- What operations are supported by the API
- What parameters are available
- What’s returned by the endpoints
- Whether authorisation is required / or not
- Licensing and contact information
There are a number of approaches for adding this to your API.
- Design first: This works by designing your API endpoints using the Swagger Editor and then using Swagger Codegen to generate the relevant code. It won’t codegen the actual functionality but you will end up with a skeleton that can be built upon.
- Code first: That is, write your code and apply the relevant attributes, associated middleware, etc. This is the approach this post will focus on
Why would I want to use Swagger?
To answer this question, we need to consider the purpose of an API:
In most cases, an API is does not operate in isolation. It needs to connect to other applications or interfaces. In many cases, the developer(s) that consume an API are not the same developers that write the API and where it is, that developer is unlikely to remeber every operation and how the endpoints were intended to be consumed and/or what the endpoint actually does.
In a nusthell, API’s are intended to be used by something or someone else. This effort becomes difficult when the consumer doesn’t know how to use it as intended - enter API documentation. Clear, up-to-date documentation makes integration tasks like this simpler and faster.
Enter Swagger…
Implementing Swagger on an .NET Core API
The full source for this post can be found here
As mentioned previously, this post will focus on the code-first approach of API design. Here we go.
Getting up and running
Initially, I just want a vanilla API and I do that by running dotnet new webapi.
When I run the application and navigate to https://localhost:<port>/api/values, the controller will spit out ["value1","value2"]. So, all working as expected.
Adding Swagger to my API
For my .NET API I’m going to use Swashbuckle.
Swashbuckle is a library that my application will use to generate the Swagger specification for my application. Also, the swagger UI is contained within this library so I get a pleasant UI as part of the deal.
In the the terminal for my project (by the way, I’m using VS Code for all this), I run `dotnet add package Swashbuckle.AspNetCore’
Next, setup the middleware in Startup.ConfigureServices:
services.AddSwaggerGen(c => { c.SwaggerDoc("v1", new Info { Title = "My API", Version = "v1" }); });
Finally, in Startup.Configure, enable the middleware which will generate the JSON documentation and provide the Swagger interface:
    app.UseSwagger();

    // Enable middleware to serve swagger-ui (HTML, JS, CSS, etc.),
    // specifying the Swagger JSON endpoint.
    app.UseSwaggerUI(c =>
    {
        c.SwaggerEndpoint("/swagger/v1/swagger.json", "My API V1");
    });
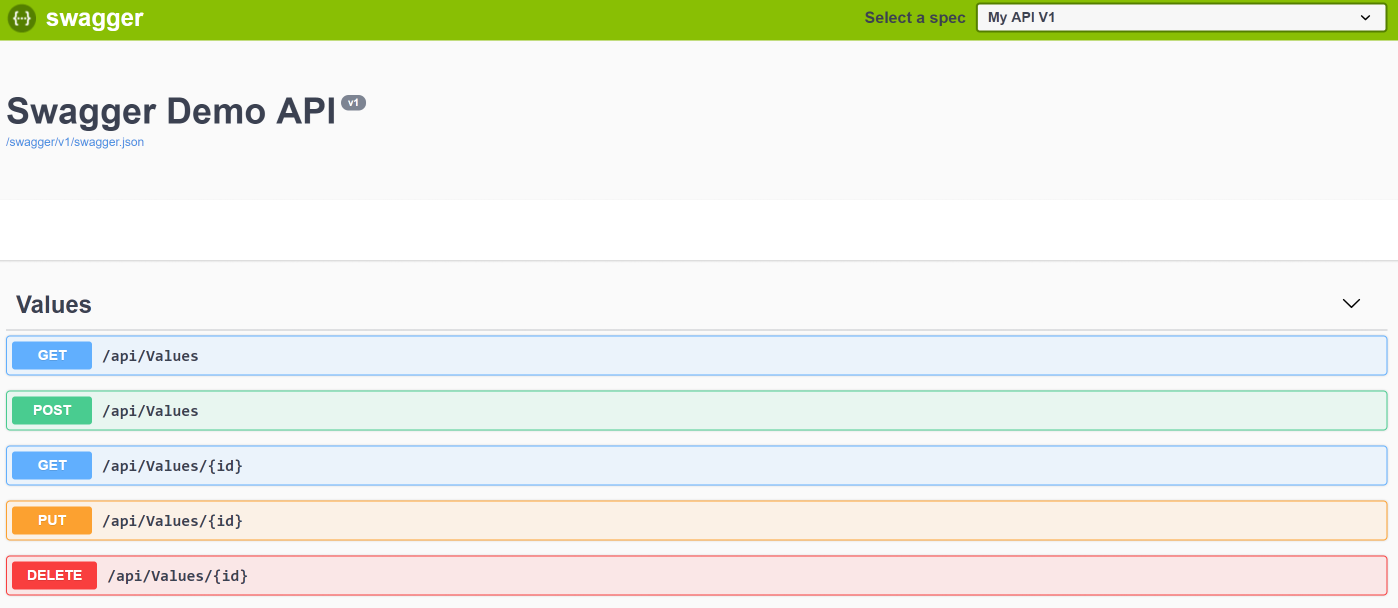
If you now navigate to https://localhost:<port>/swagger you now end up with a pretty UI and are able to interact with you API endpoints.
Any there it is.
In the next post I’ll cover how to add attributes to API endpoints so they appear in the Swagger documentation as well as additional, nifty, features.